Several types of cloth reusable face masks are addressed here. I wanted to make face masks using materials I already had and items that could be re-purposed and reused.
Since social media is all a buzz about more medical-looking face mask, I’ll share this first. I was fortunate to have a scrap/rag bag going on when COVID 19 happened. When the need for masks arose, I pulled out my bag and went through it for usable material.
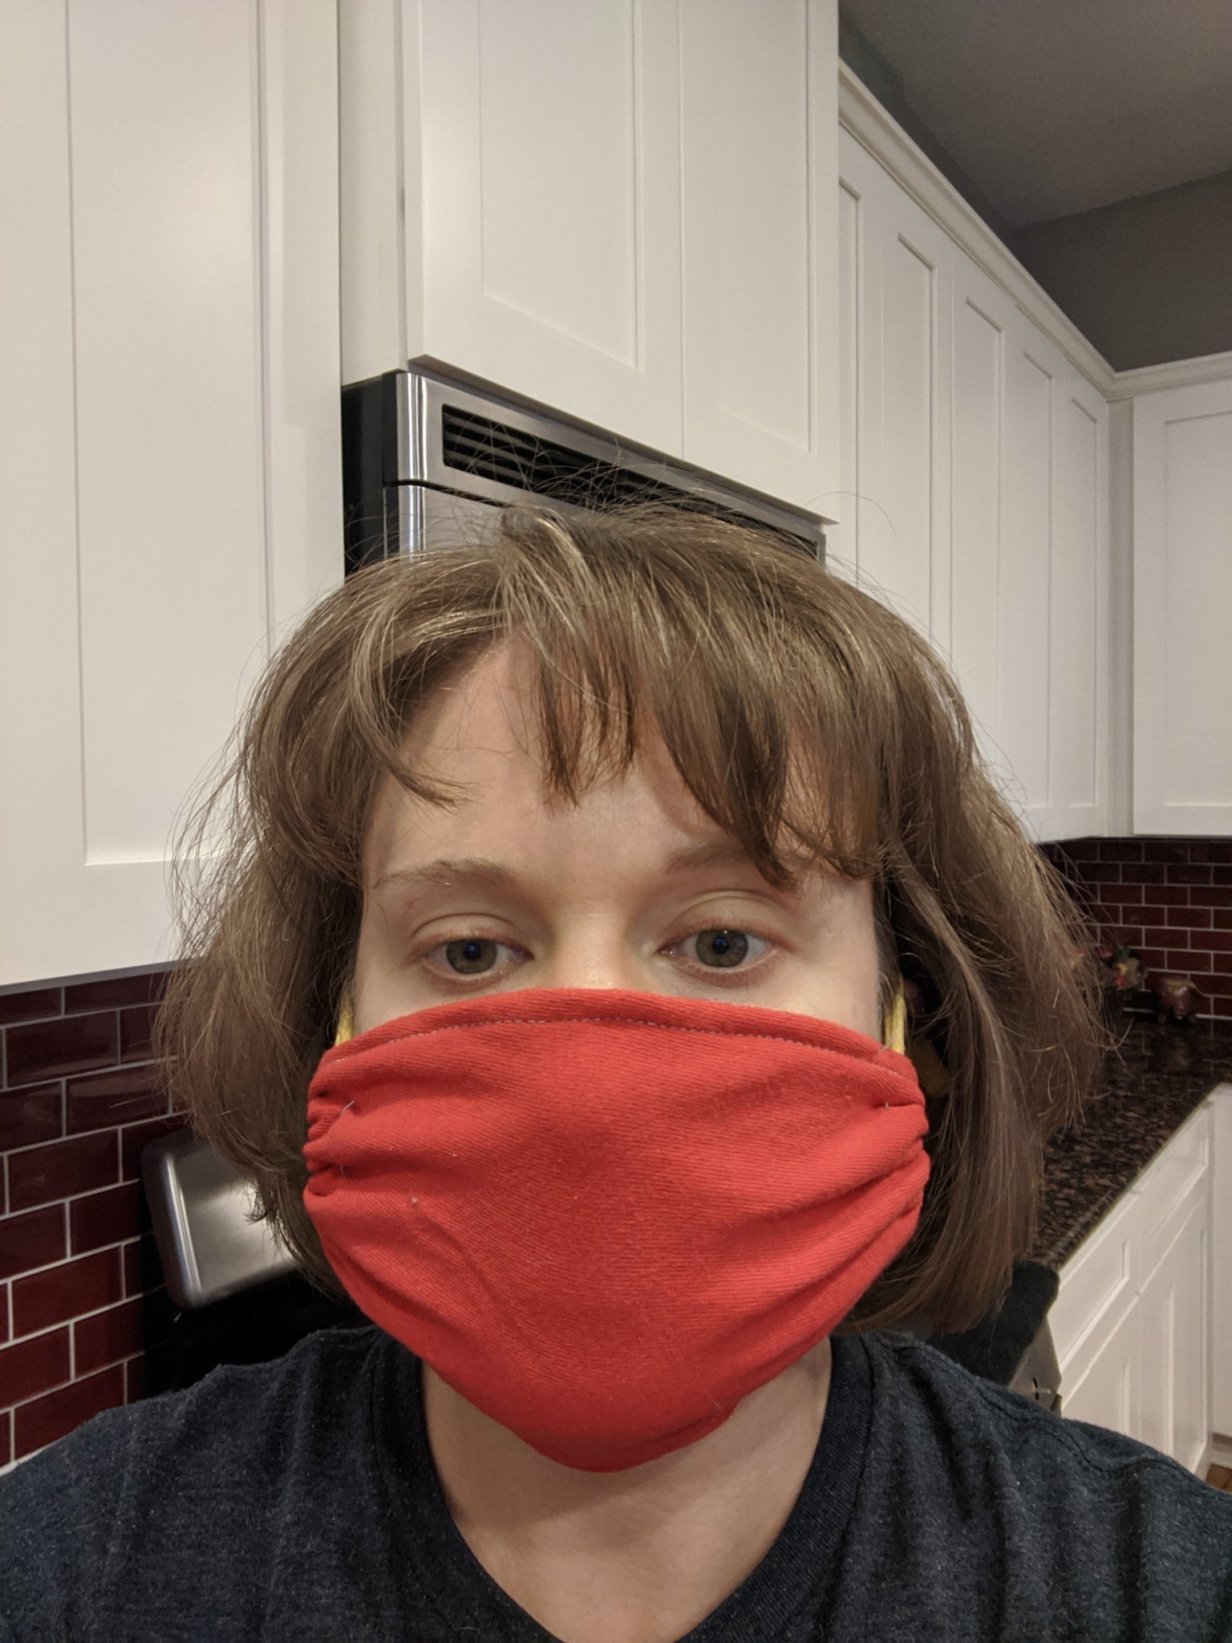
I pulled out two t-shirts (I had read that having two colors can help you see the difference between the front and the back) however the way I sew the seams tells me so this was an extra step for me, but it could be helpful for those new to sewing or who have particular wants for the front and back. My son’s gray shirt had screen-printing that was cracking (this is why I try to avoid screen-print heavy shirts if possible) and felt uncomfortable to wear, and my red shirt had oil stains on it that I could not get out.


PBS posted this link on their Facebook page earlier this month. It’s the instructions I used to make my masks.
I did cut out the rectangles the size the instructions recommended. I am mostly a mender and fixer of seams, so I do not have a fancy measuring board to cut, a cutter, etc. I used a ruler and a piece of my son’s chalk to measure the rectangles. I don’t mind if it’s not exact, it’s for my family’s personal use, I did the best I could without worrying about it.


I asked my husband which color he preferred inside since he’s doing the shopping. He preferred red. As the gray shirt is softer, I preferred red on the outside and gray on the inside as well so that worked out nicely. I could have made one each way.


It’s been awhile since my sewing classes but I think the pin heads are supposed to be on the left. The right seems to work better for me, I just have to be more careful.

I did switch which sides held the ties. On the instructions the larger seam is on the sides to allow for elastic or hair ties. Because I wanted more surgical-style with the long shoelaces, I put the larger seam allowance on the top and bottom. So pictured here: the sides have 1/4″ seams and the top 1/2″ seams, approximately (I’m not an expert and wasn’t consistently measuring to be exact).
Instead of using elastic (which I don’t technically have), rubber bands, sting (don’t have), cloth strips, or hair ties, I wanted to use shoelaces. They’re reusable and multi-purpose used this way.
I have some pieces of clothing that are rags that do have elastic. If I really wanted to (as they did in WWII) I could figure out how to use the old elastic from my slip that shrank and some old underwear. I thought it would be easier to use my husband’s shoelaces. They’re long, well made, and can be put back in his sneakers when this is over. Most rubber bands I have can be too tight for me and they don’t work for my husband at all (I’m 5’1″ and he’s 6’3″ so what works for one doesn’t for the other). I don’t have string or yarn, my hair ties are way too tight, but we can use shoelaces out of shoes my husband isn’t wearing now like old sneakers and his dress shoes. Size 13 shoes give you some nice long shoelaces.


If you have concerns about two-layers, I did cut out the rest of the red shirt and made a four-layer mask. I measured out with chalk four sections, but only cut one big piece and folded the mask. Less sewing. You’ll see I didn’t have to sew a bottom seam here since I folded. If the shoelace on the bottom moves too much, I may tack a stitch or two above the middle to keep the shoelace from moving up, but right now we put that edge on the bottom.
My mom did share that if your glasses fog up, or you want a closer seal around your nose, if you put a pipe cleaner in the middle of the top you can mold that to your nose. Fold a pipe cleaner in half, the twist slightly to kind of bind it, cover the ends with tape so they don’t poke up and wiggle it into place. If you don’t want it to move, you could put some stitches under it. I accidentally laundered a pipe cleaner and it survived intact, but I wouldn’t recommend regular laundering. If you add some stitches to hold the pipe cleaner in place, try to make it so you can get your pipe cleaner back out or hand wash if it’s stuck in place.
Using the medium red shirt’s bottom, I did get six 6″ x 10″ sections of fabric. I haven’t cut up the rest of the shirt yet, but I could probably get another four sections of this size. I did keep all the original shirt’s hems just to make it easier and my sewing machine can handle it. I used contrasting thread (gray) so I could see better since I haven’t sewn in four years, and again it’s only been mending holes and fixing seams. I took three classes on how to measure out fabric, pin, hem and sew with back-stitch and I am so grateful I remembered how to do all that.
I think the quickest DIY mask is using a bandanna. You can reuse and repurpose those all day long!

I cannot get cowboy-style tying to stay up on my head so I used the no-sew face mask with a bandanna. We have a collection of cotton bandannas from work and service events oddly enough. My husband’s job uses them to color code staff on their service project days. You get four layers of fabric and a lot of vertical coverage. This does not stay in place for the tall hubby.

My bandanna mask used a bandanna and rubber bands. The hair ties I tried at first were too tight for my ears and the rubber bands work for me, but not my husband. My rubber bands are re-used, they’re the ones off asparagus, broccoli and other produce.
I haven’t yet tried the sock version from the instructions PBS shared, I actually don’t have any worn-out socks right now! I know many people do, and they look comfy so I’d try it if I had socks to spare or really needed a mask.

My mom brought me and my husband the more traditional medical masks of tight cotton/polyester weave with three folds and larger hair ties or elastic. Mom didn’t care for the elastic, she and my dad prefer the larger hair ties. Comfort-wise and breathing wise I actually prefer my bandanna with rubber bands, and my husband likes these cloth rectangles with shoelaces.

This is a strip of old yellow t-shirt from my niece. If you cut a small strip off and pull on it, it will roll up and stretch out as a usable cord option.

I finished this two-sided mask with super quick larger hand stitching to show you it can be done. Smaller/tighter stitching would be stronger here but you get the idea. I used the t-shirt cord to show you that works in hand stitching.

If you don’t have a sewing machine and are hand sewing, the pinking shears pictured here (with the zigzag teeth) can help fabric not fray as much, it still may fray just not as bad as a straight edge cut. You may not have pinking shears but you may have scrapbook scissors with this blade type.


Make sure you make small enough loops regardless of the loop material you use so that there is not a gap at your cheeks. Keep the ties out if you need to adjust them, or if you prefer a cleaner look, you can pull and wiggle the sides until the tie slides into the fabric.
I did the water spray bottle test and the “can you blow a match out test” will all of these, even the two layer t-shirt masks, and they all passed both tests.
I hope these help and give you some ideas on how to be creative with what you have around the house.